BeamMP Server - Instructions
Detailed instructions for setting up and connecting to the BeamNG server.
Step 1: Server Setup & BeamMP Registration
1. Access the Panel
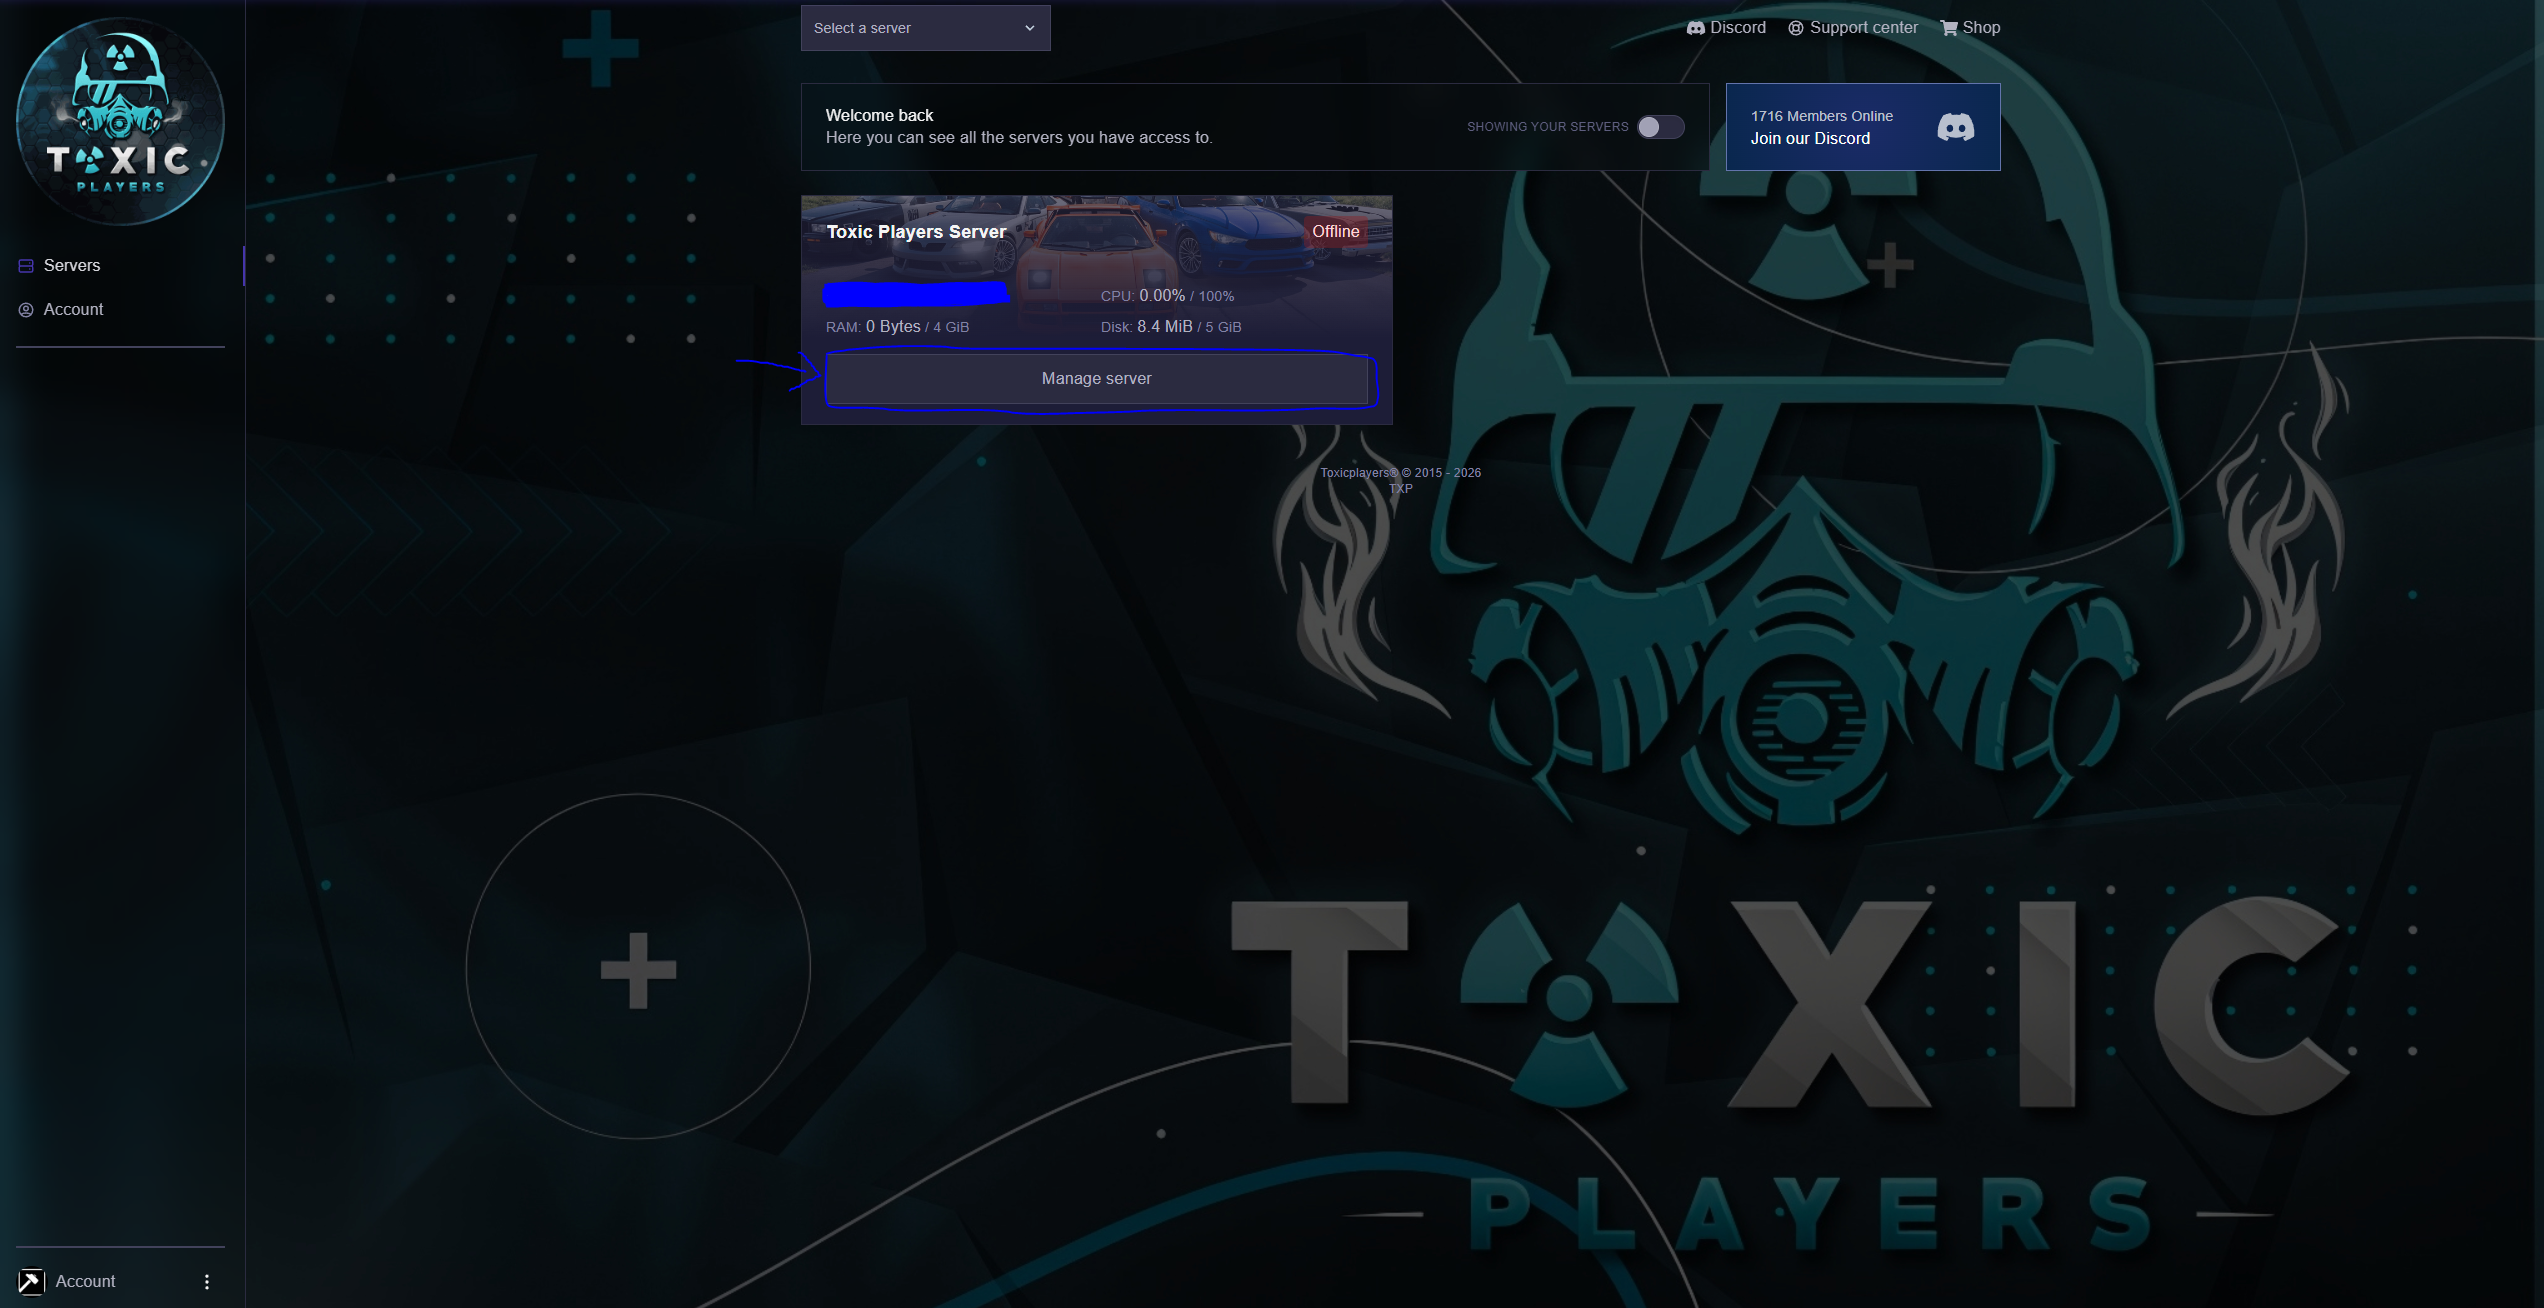
- Go to your panel: https://toxicplayers.co/
- Press the Manage Server button
2. Start the Server
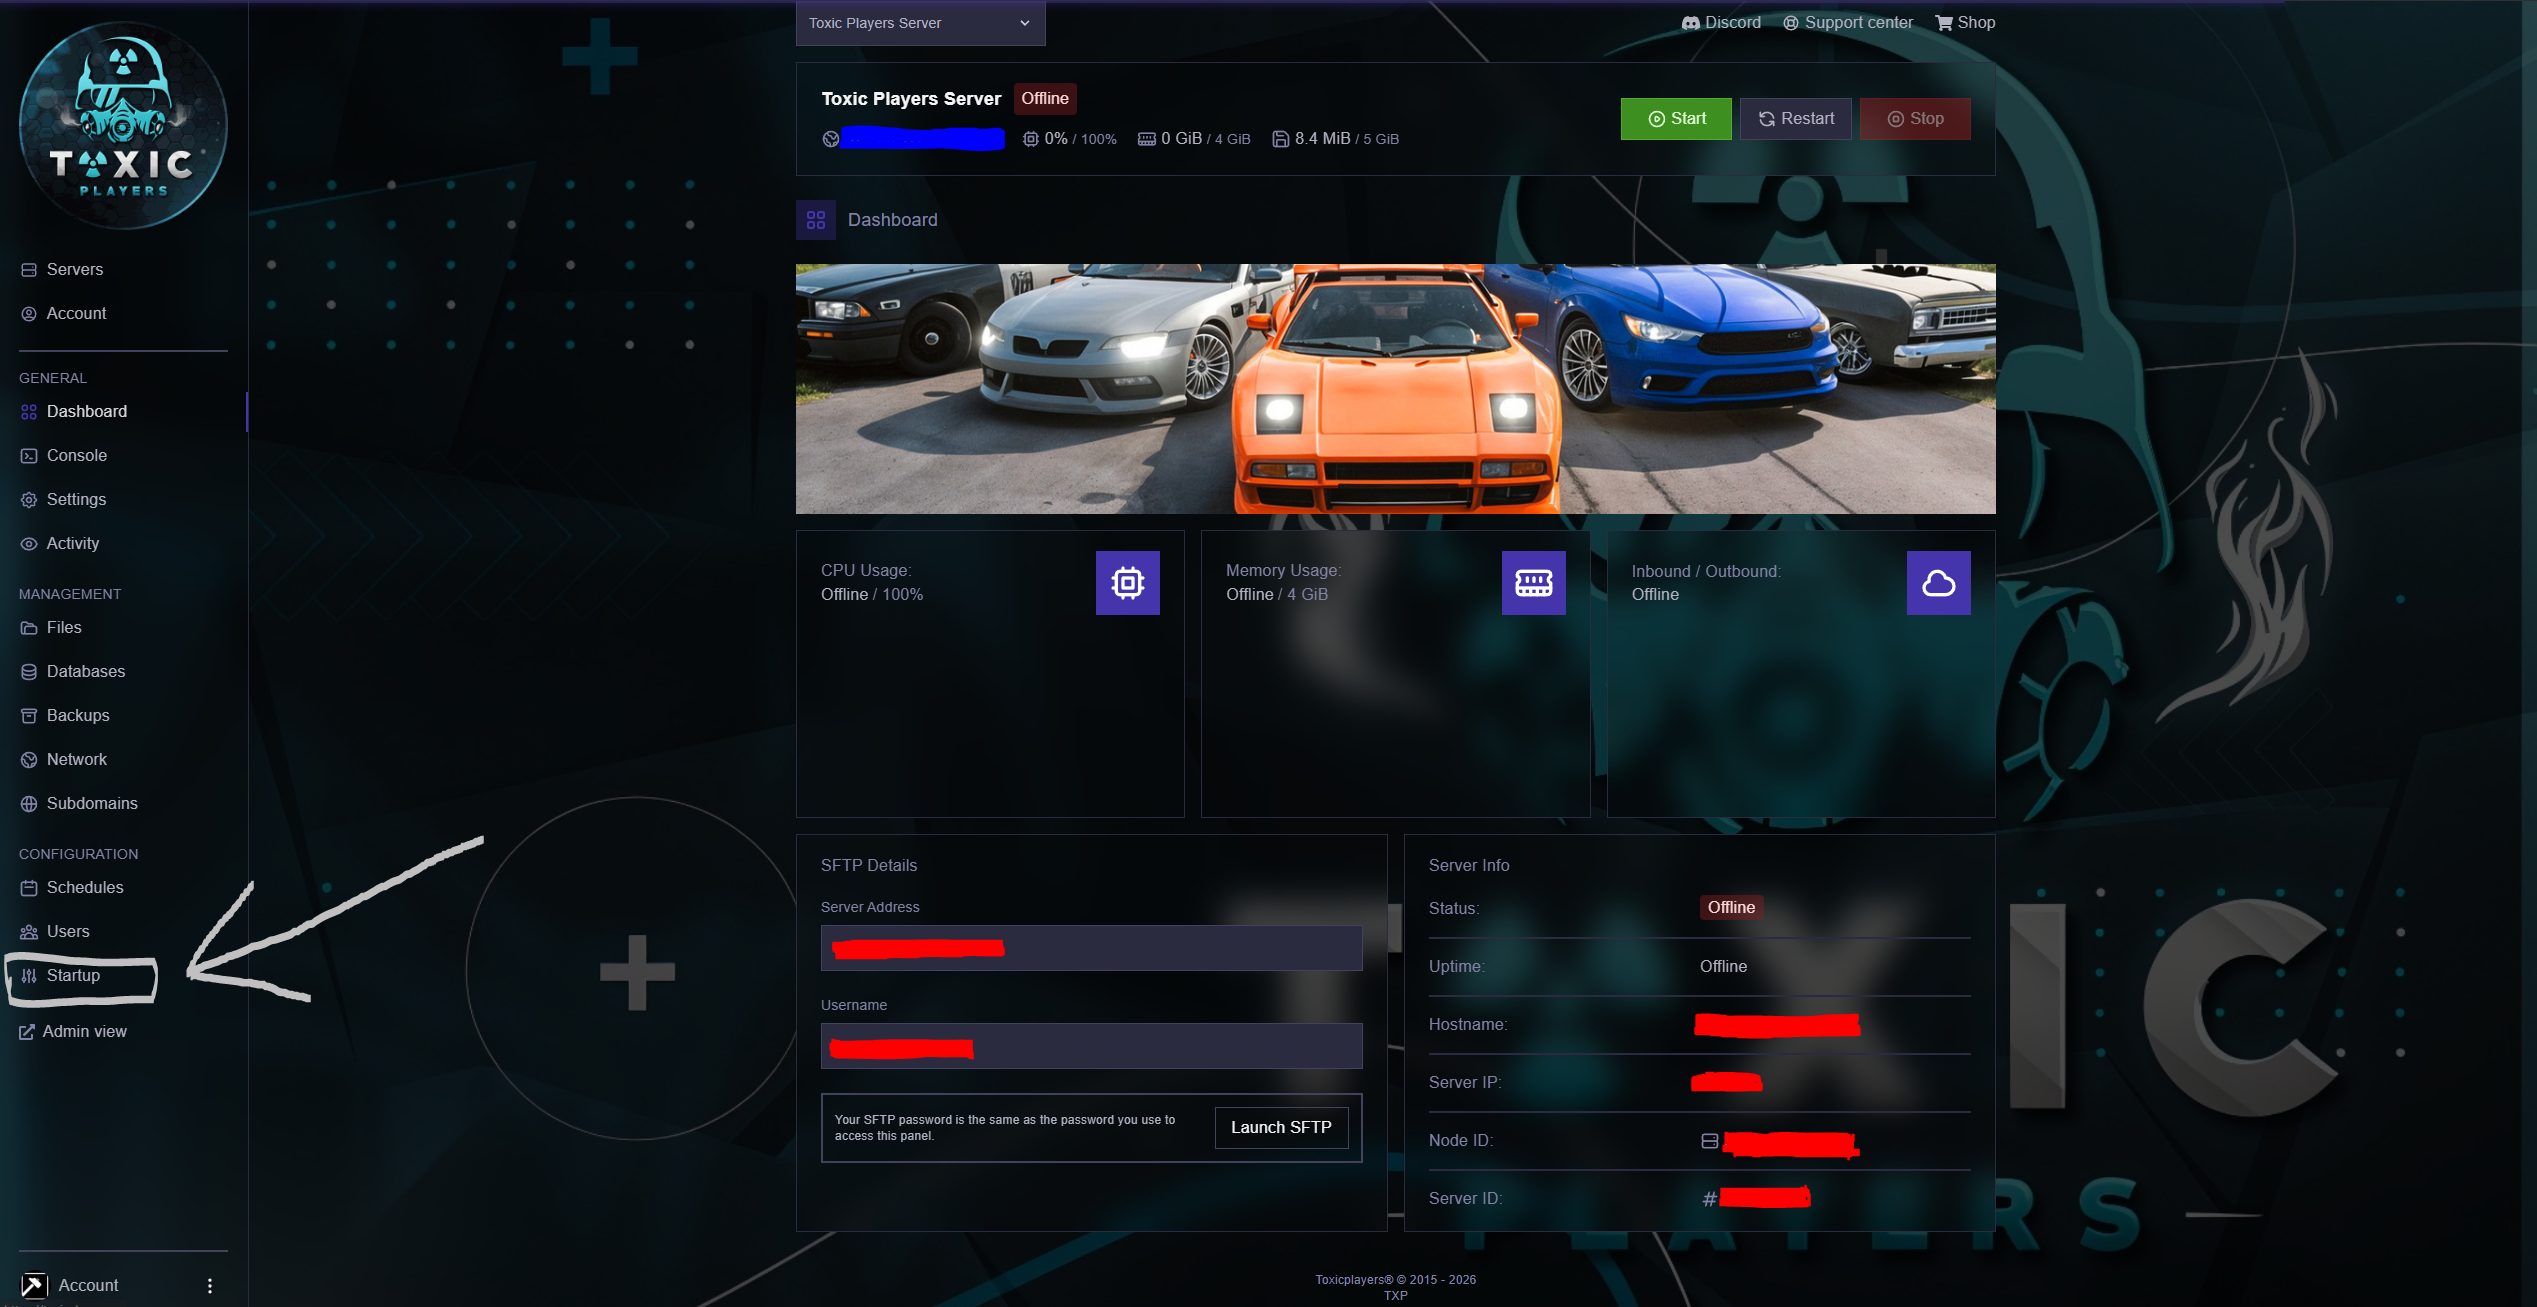
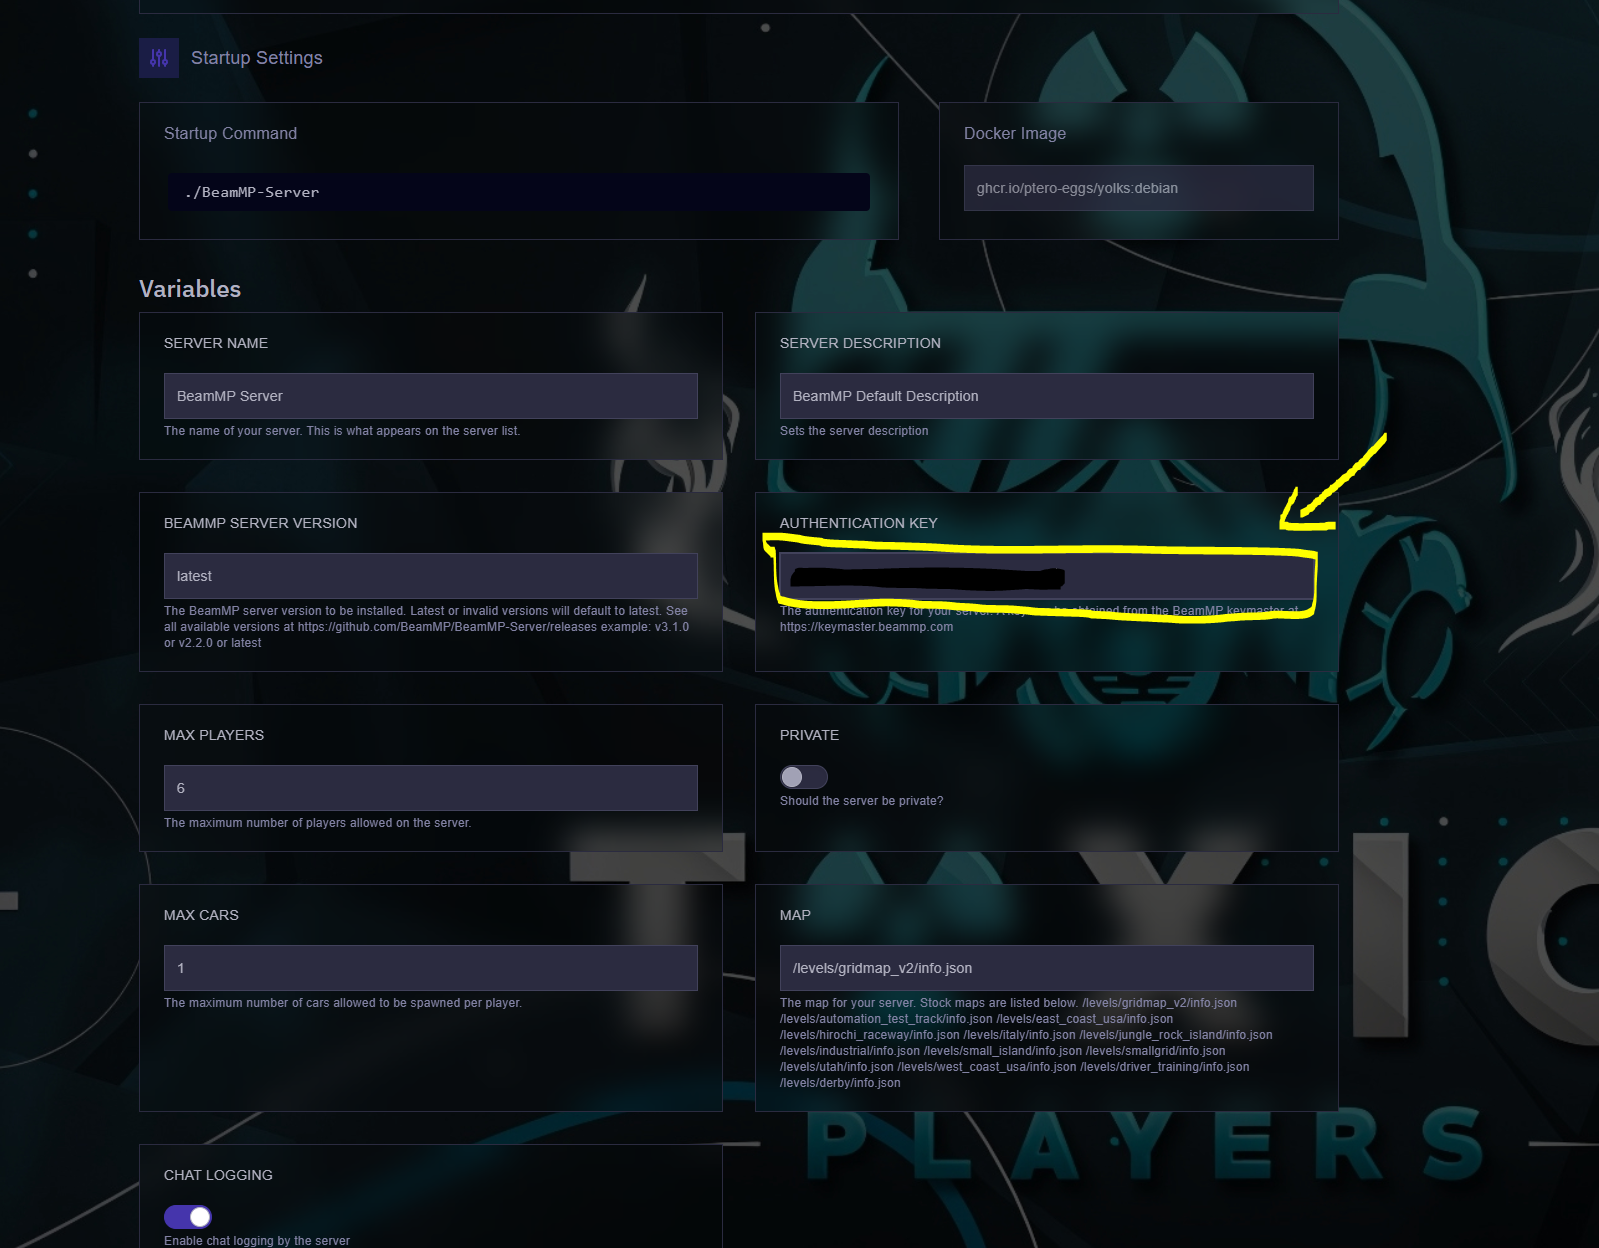
- Press the Startup button
3. Get the Authentication Key (AUTHKEY)
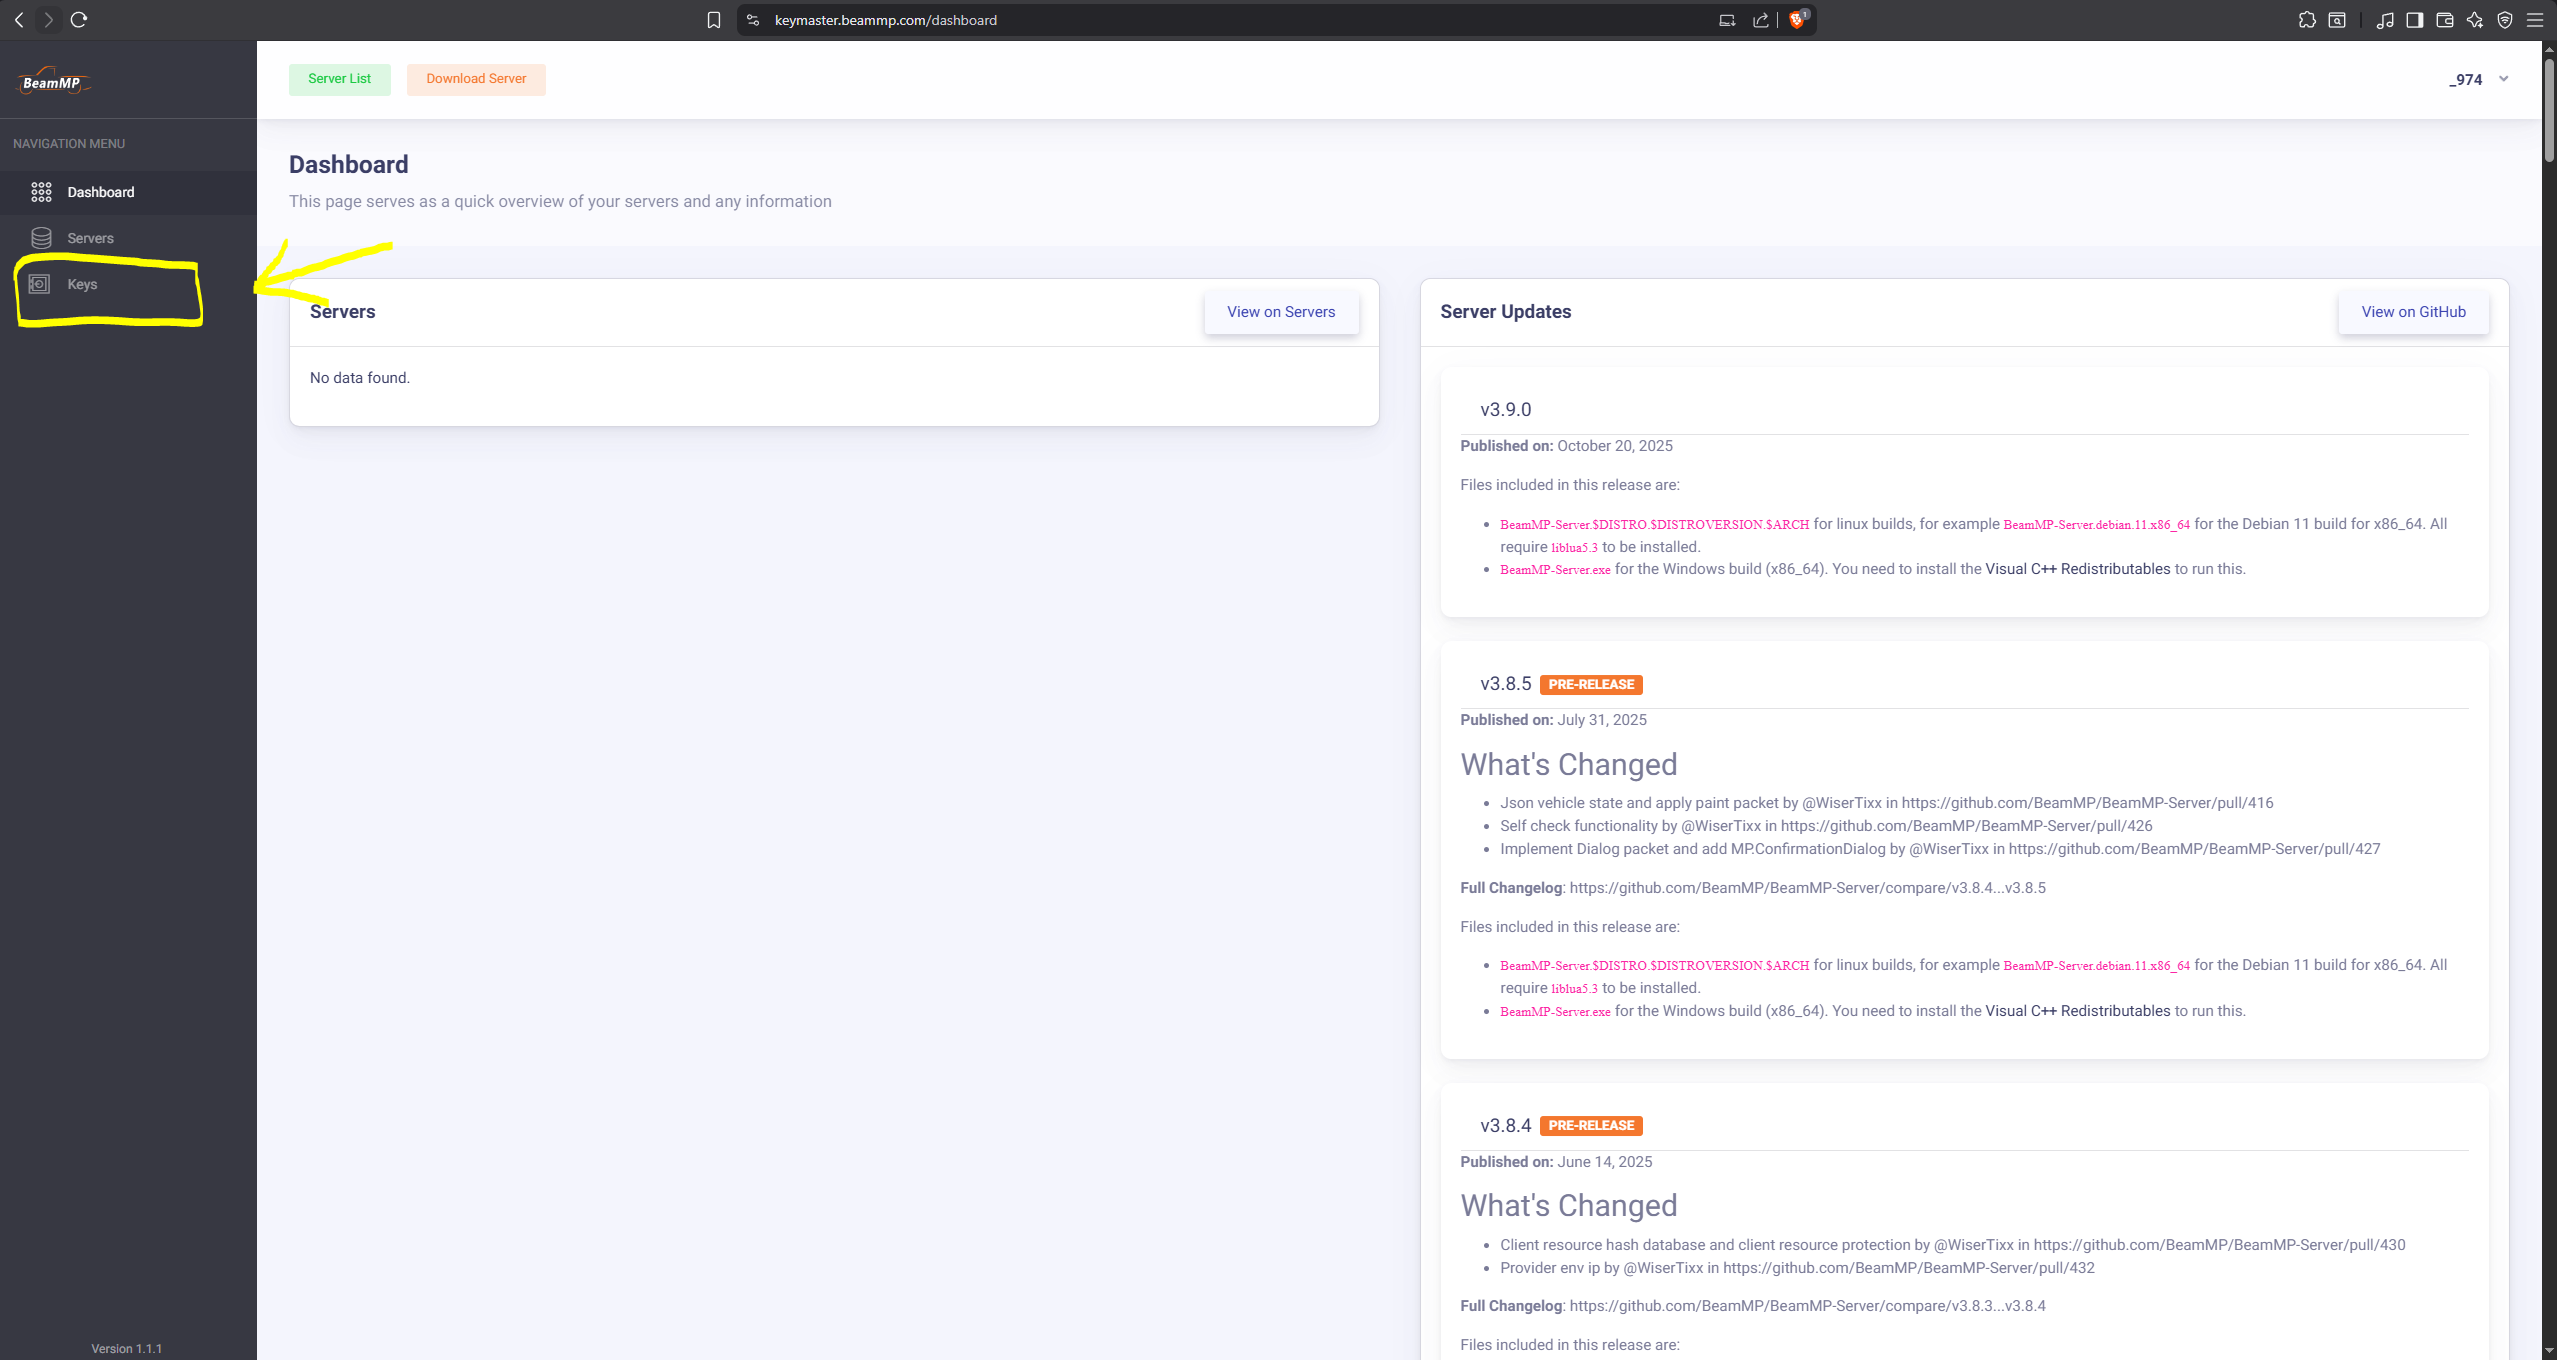
You must place the AUTHKEY in the Authentication Key field. To obtain the key, register at: https://keymaster.beammp.com
- Click the Key button as shown in the image
- Click the + (plus) button
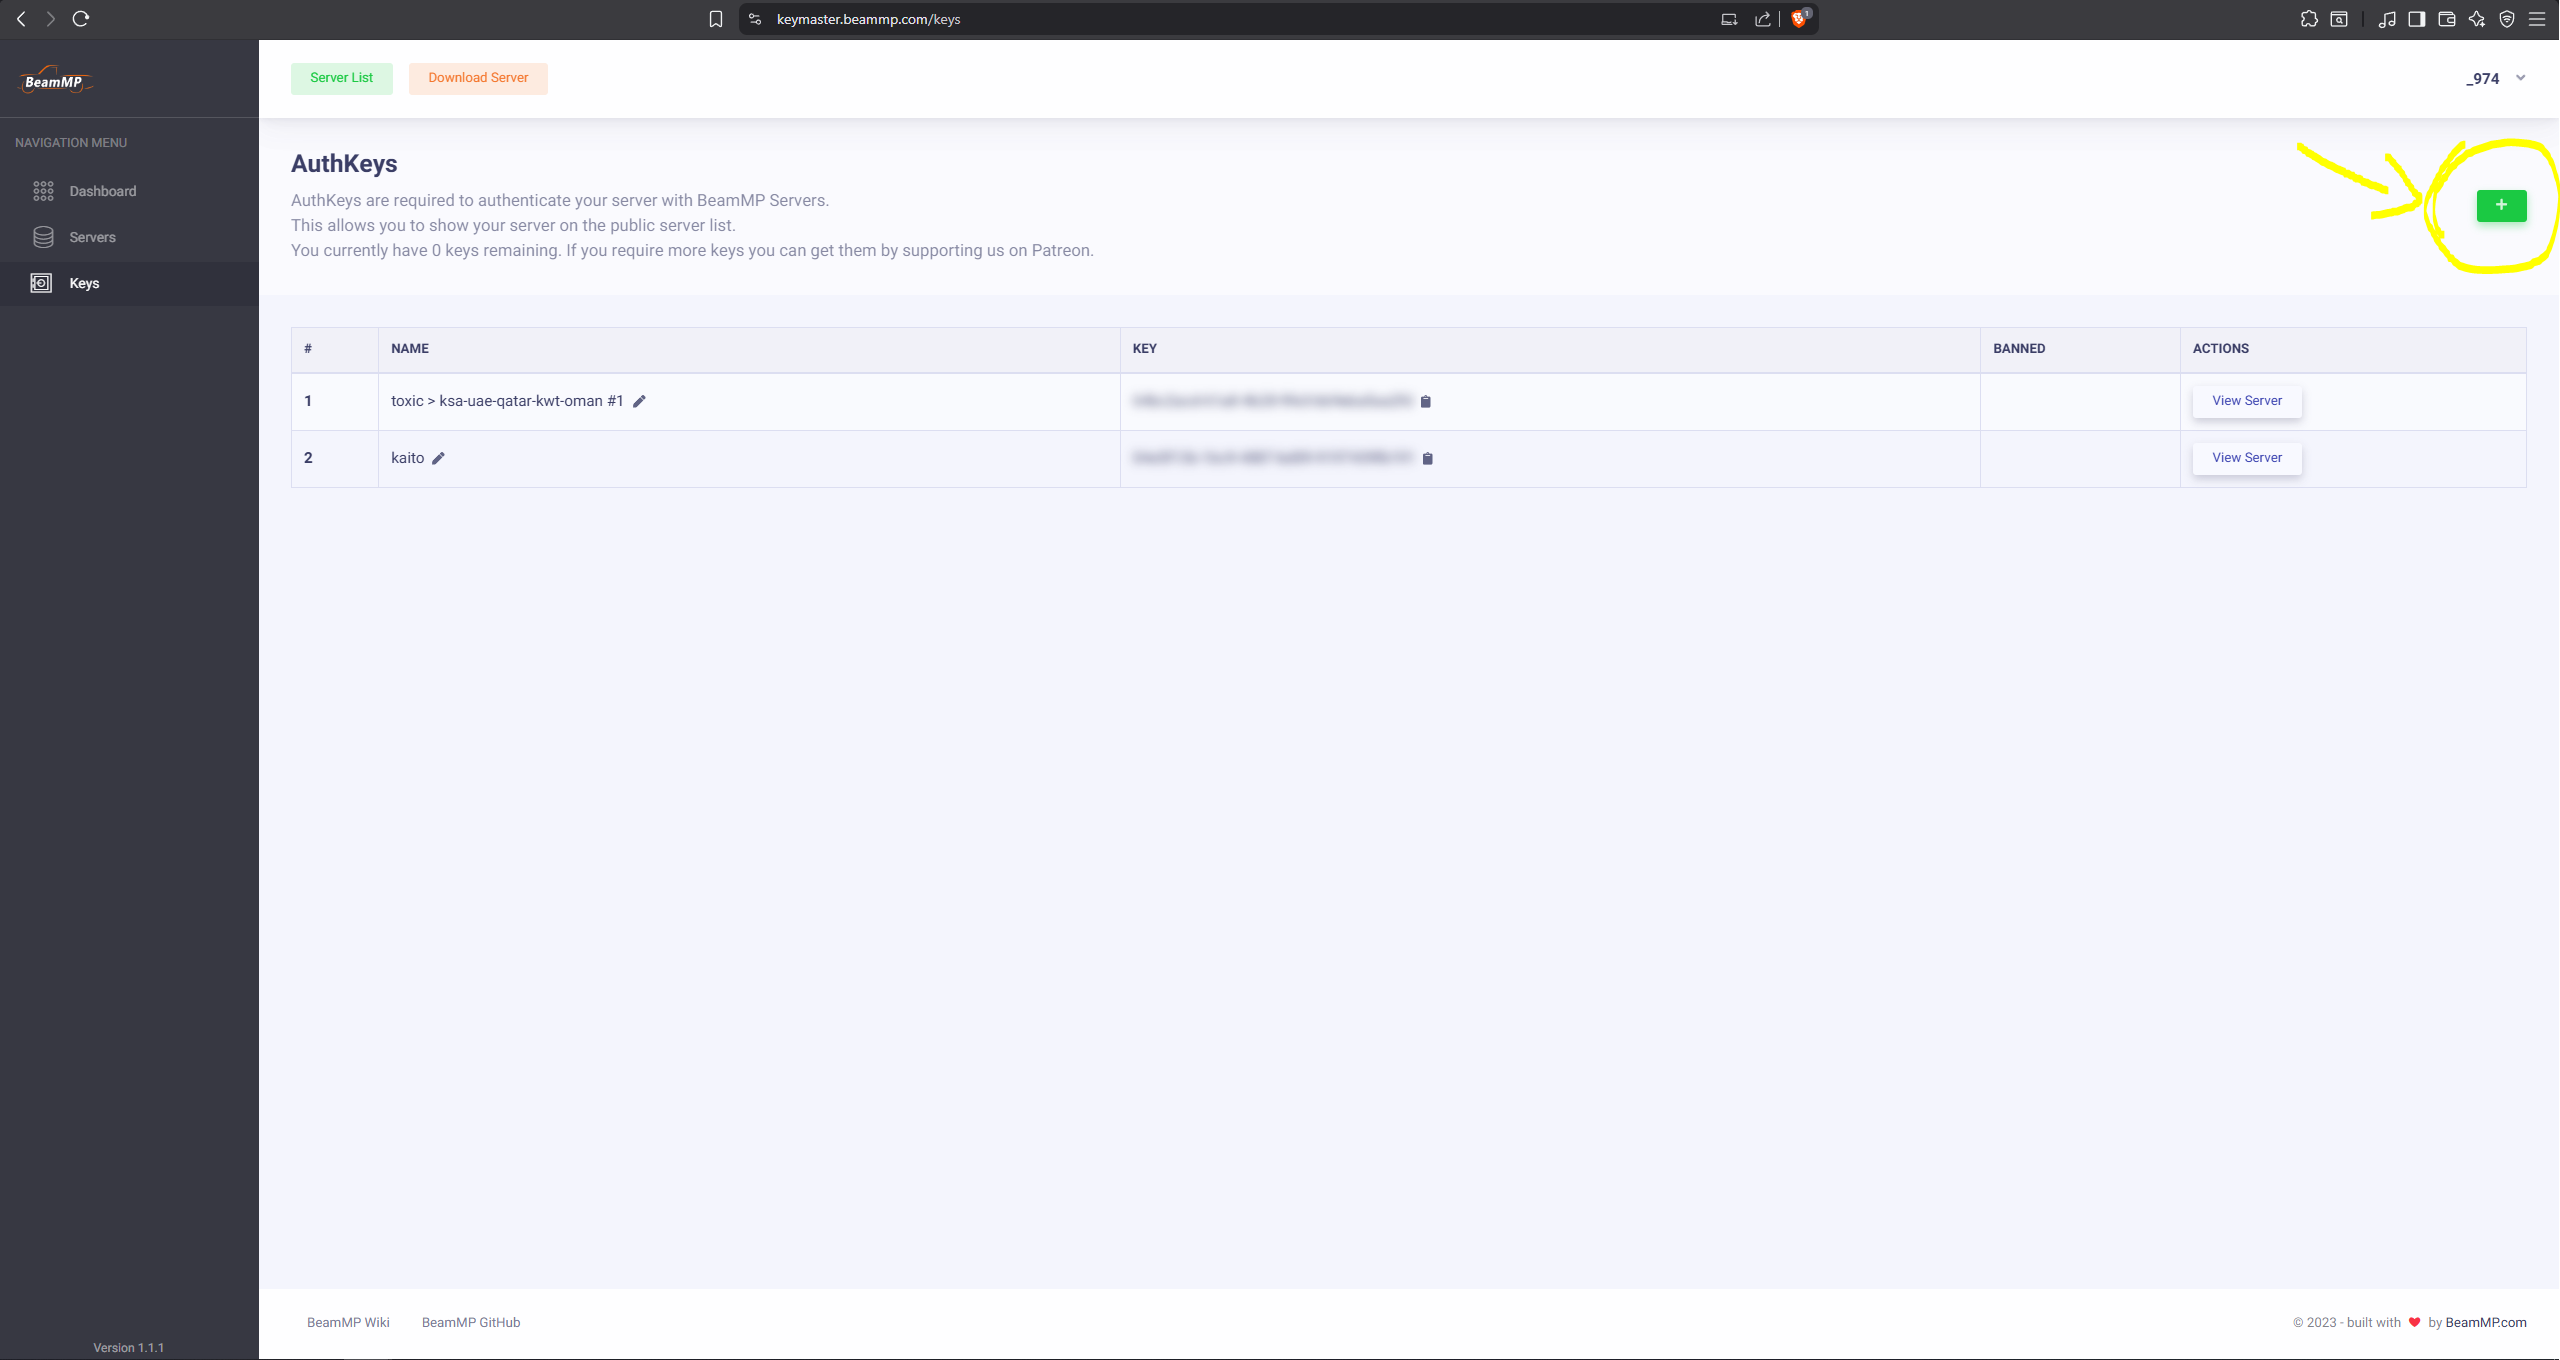
- In the Server Name field, enter the name you want
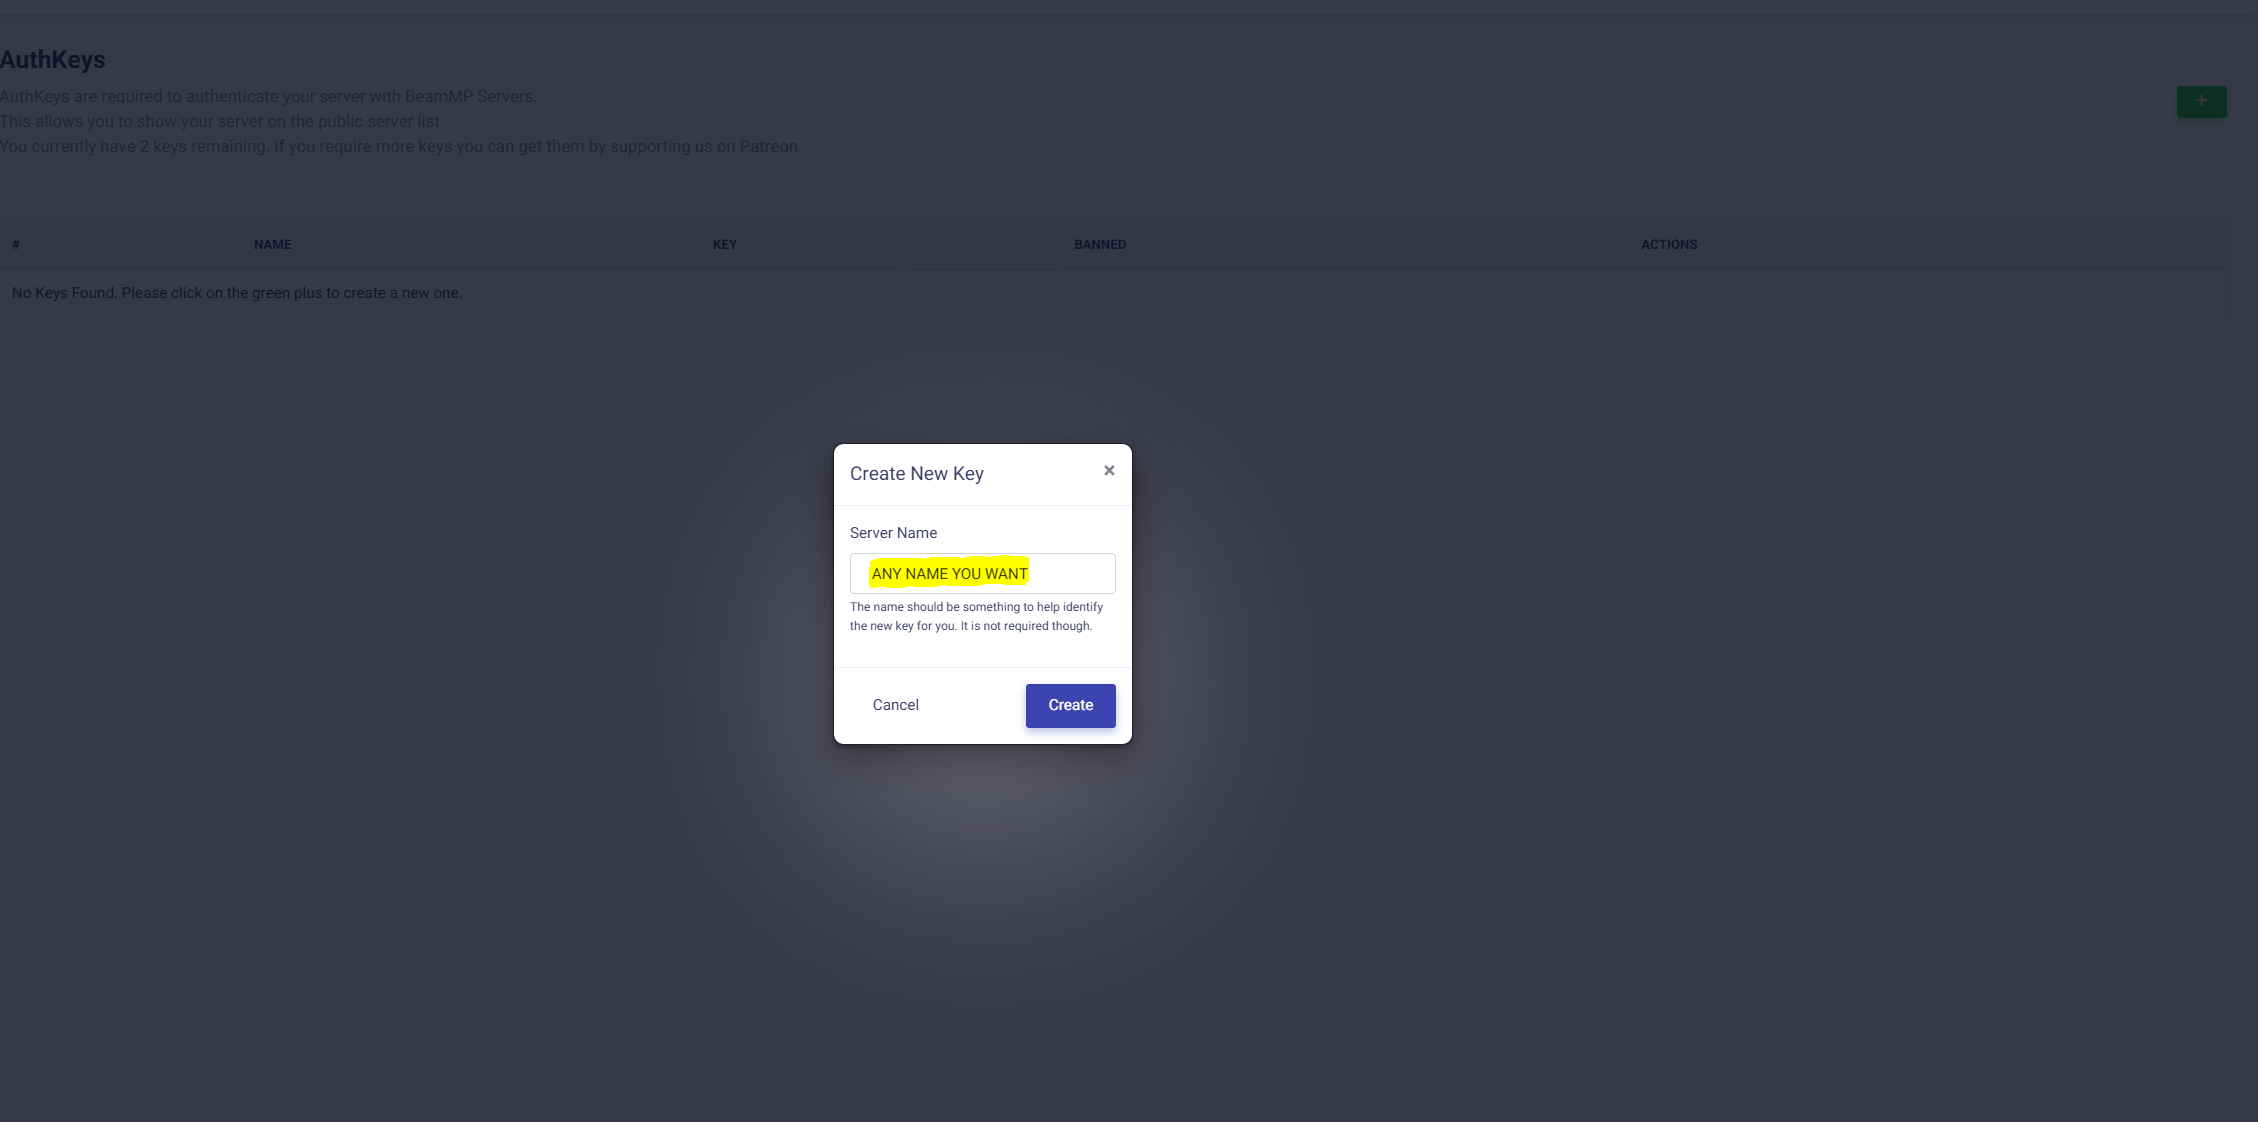
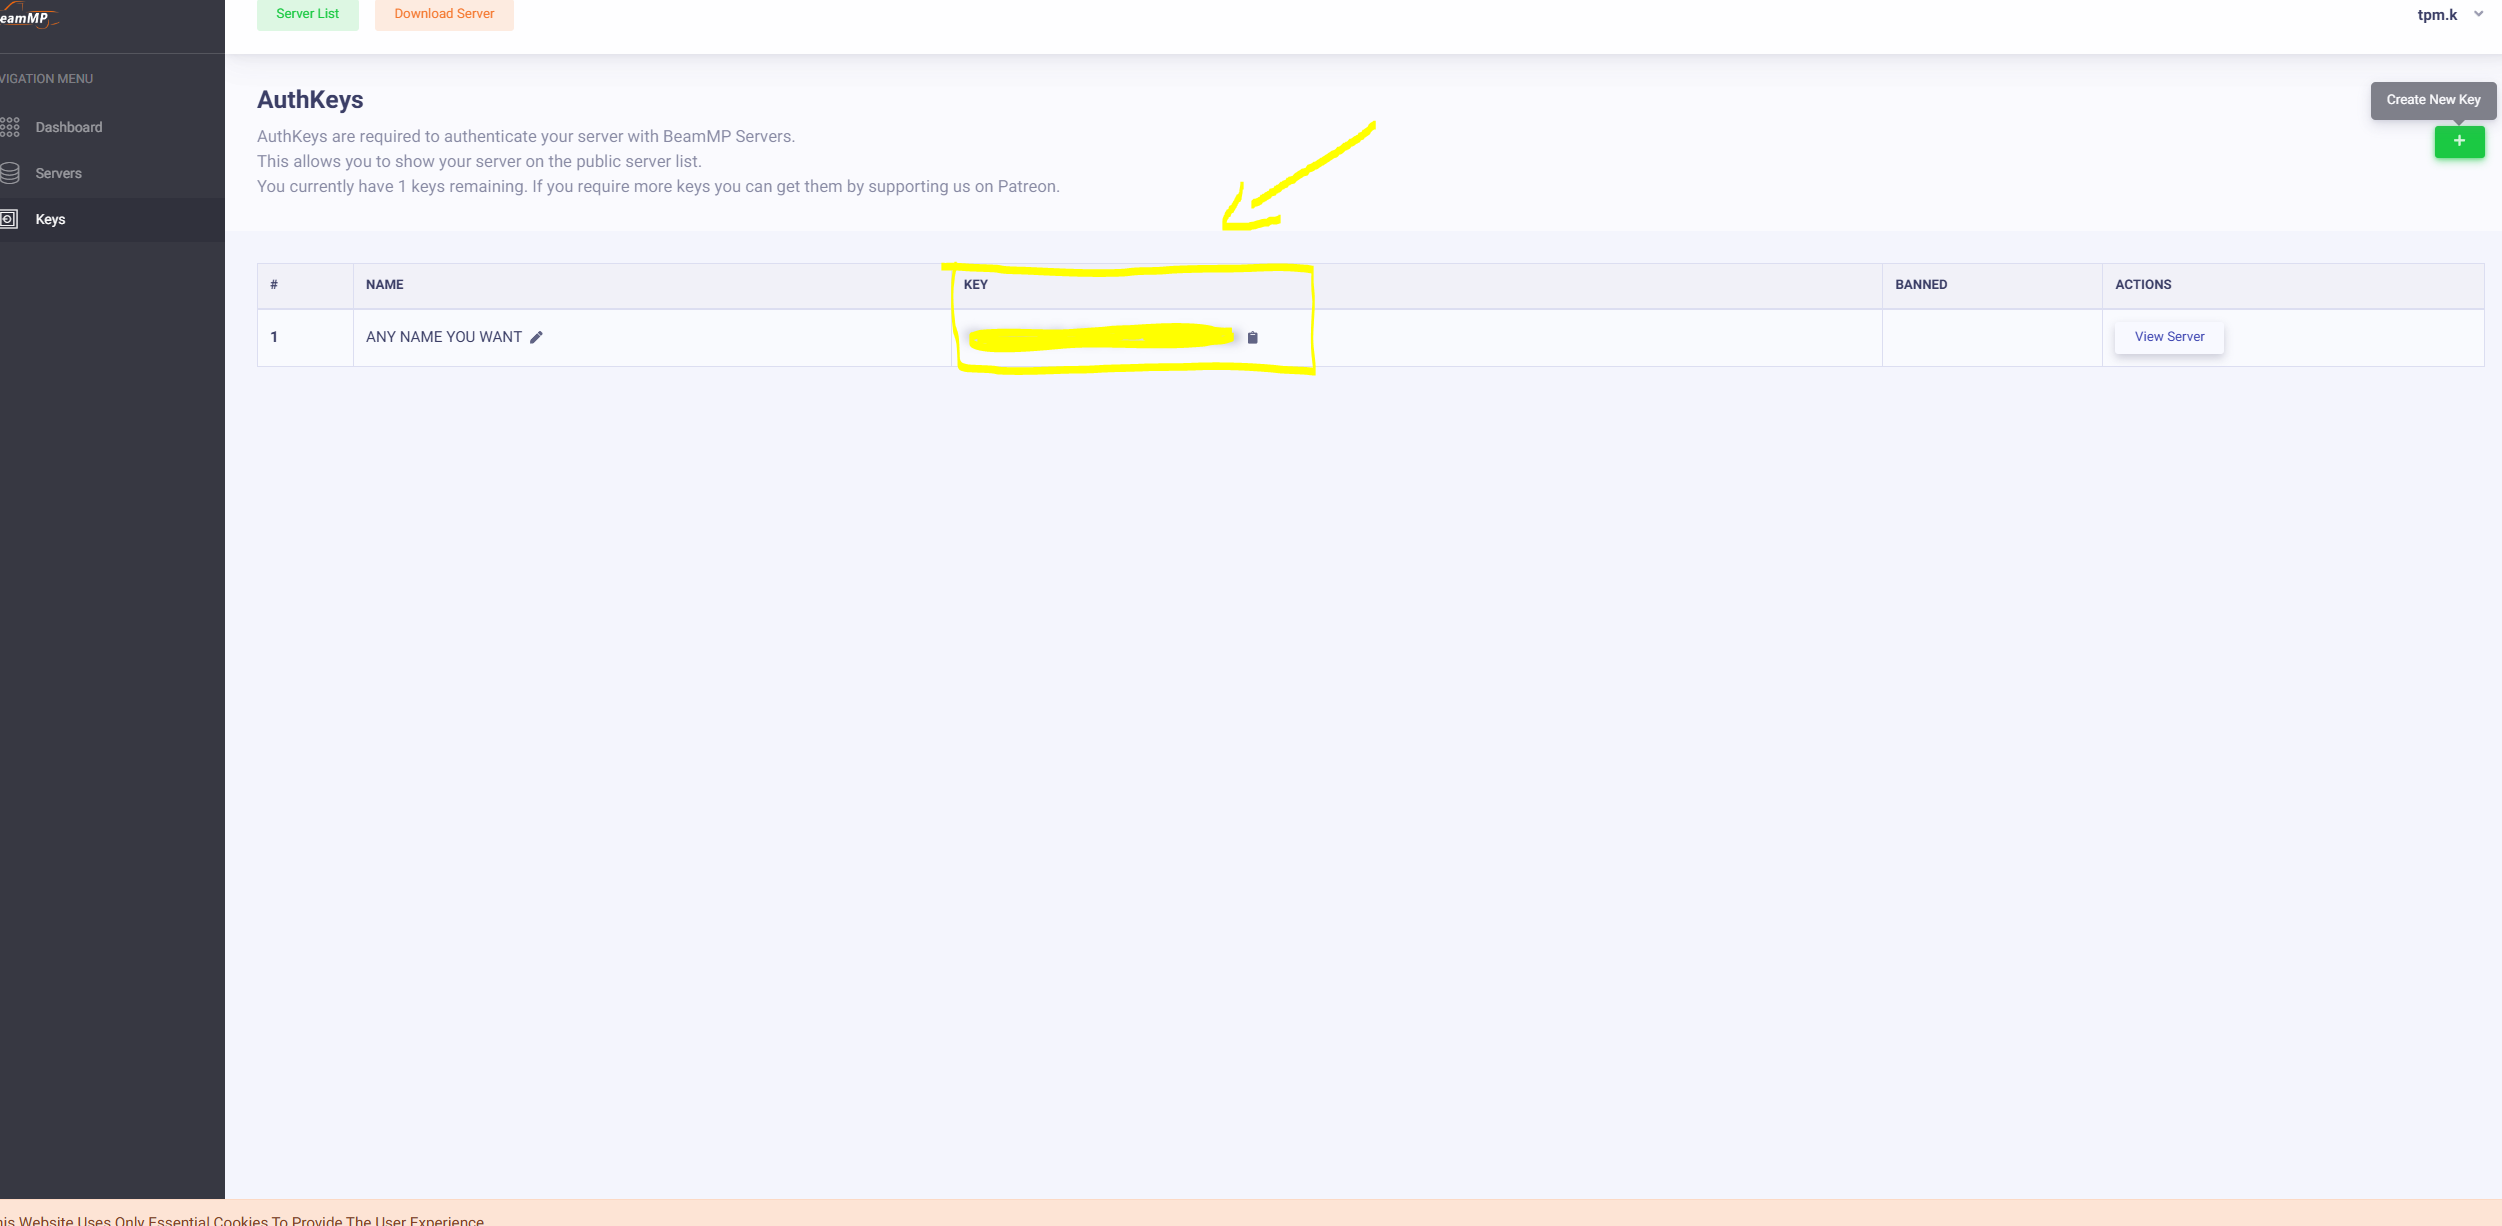
- Copy the key exactly as shown in the image
- Paste the key into the Authentication Key field
Step 2: Connecting to the Server Using SFTP (FileZilla)
1. Get Connection Details
- Go to your panel: https://toxicplayers.co/
- Press the Manage Server button
- Go to Settings
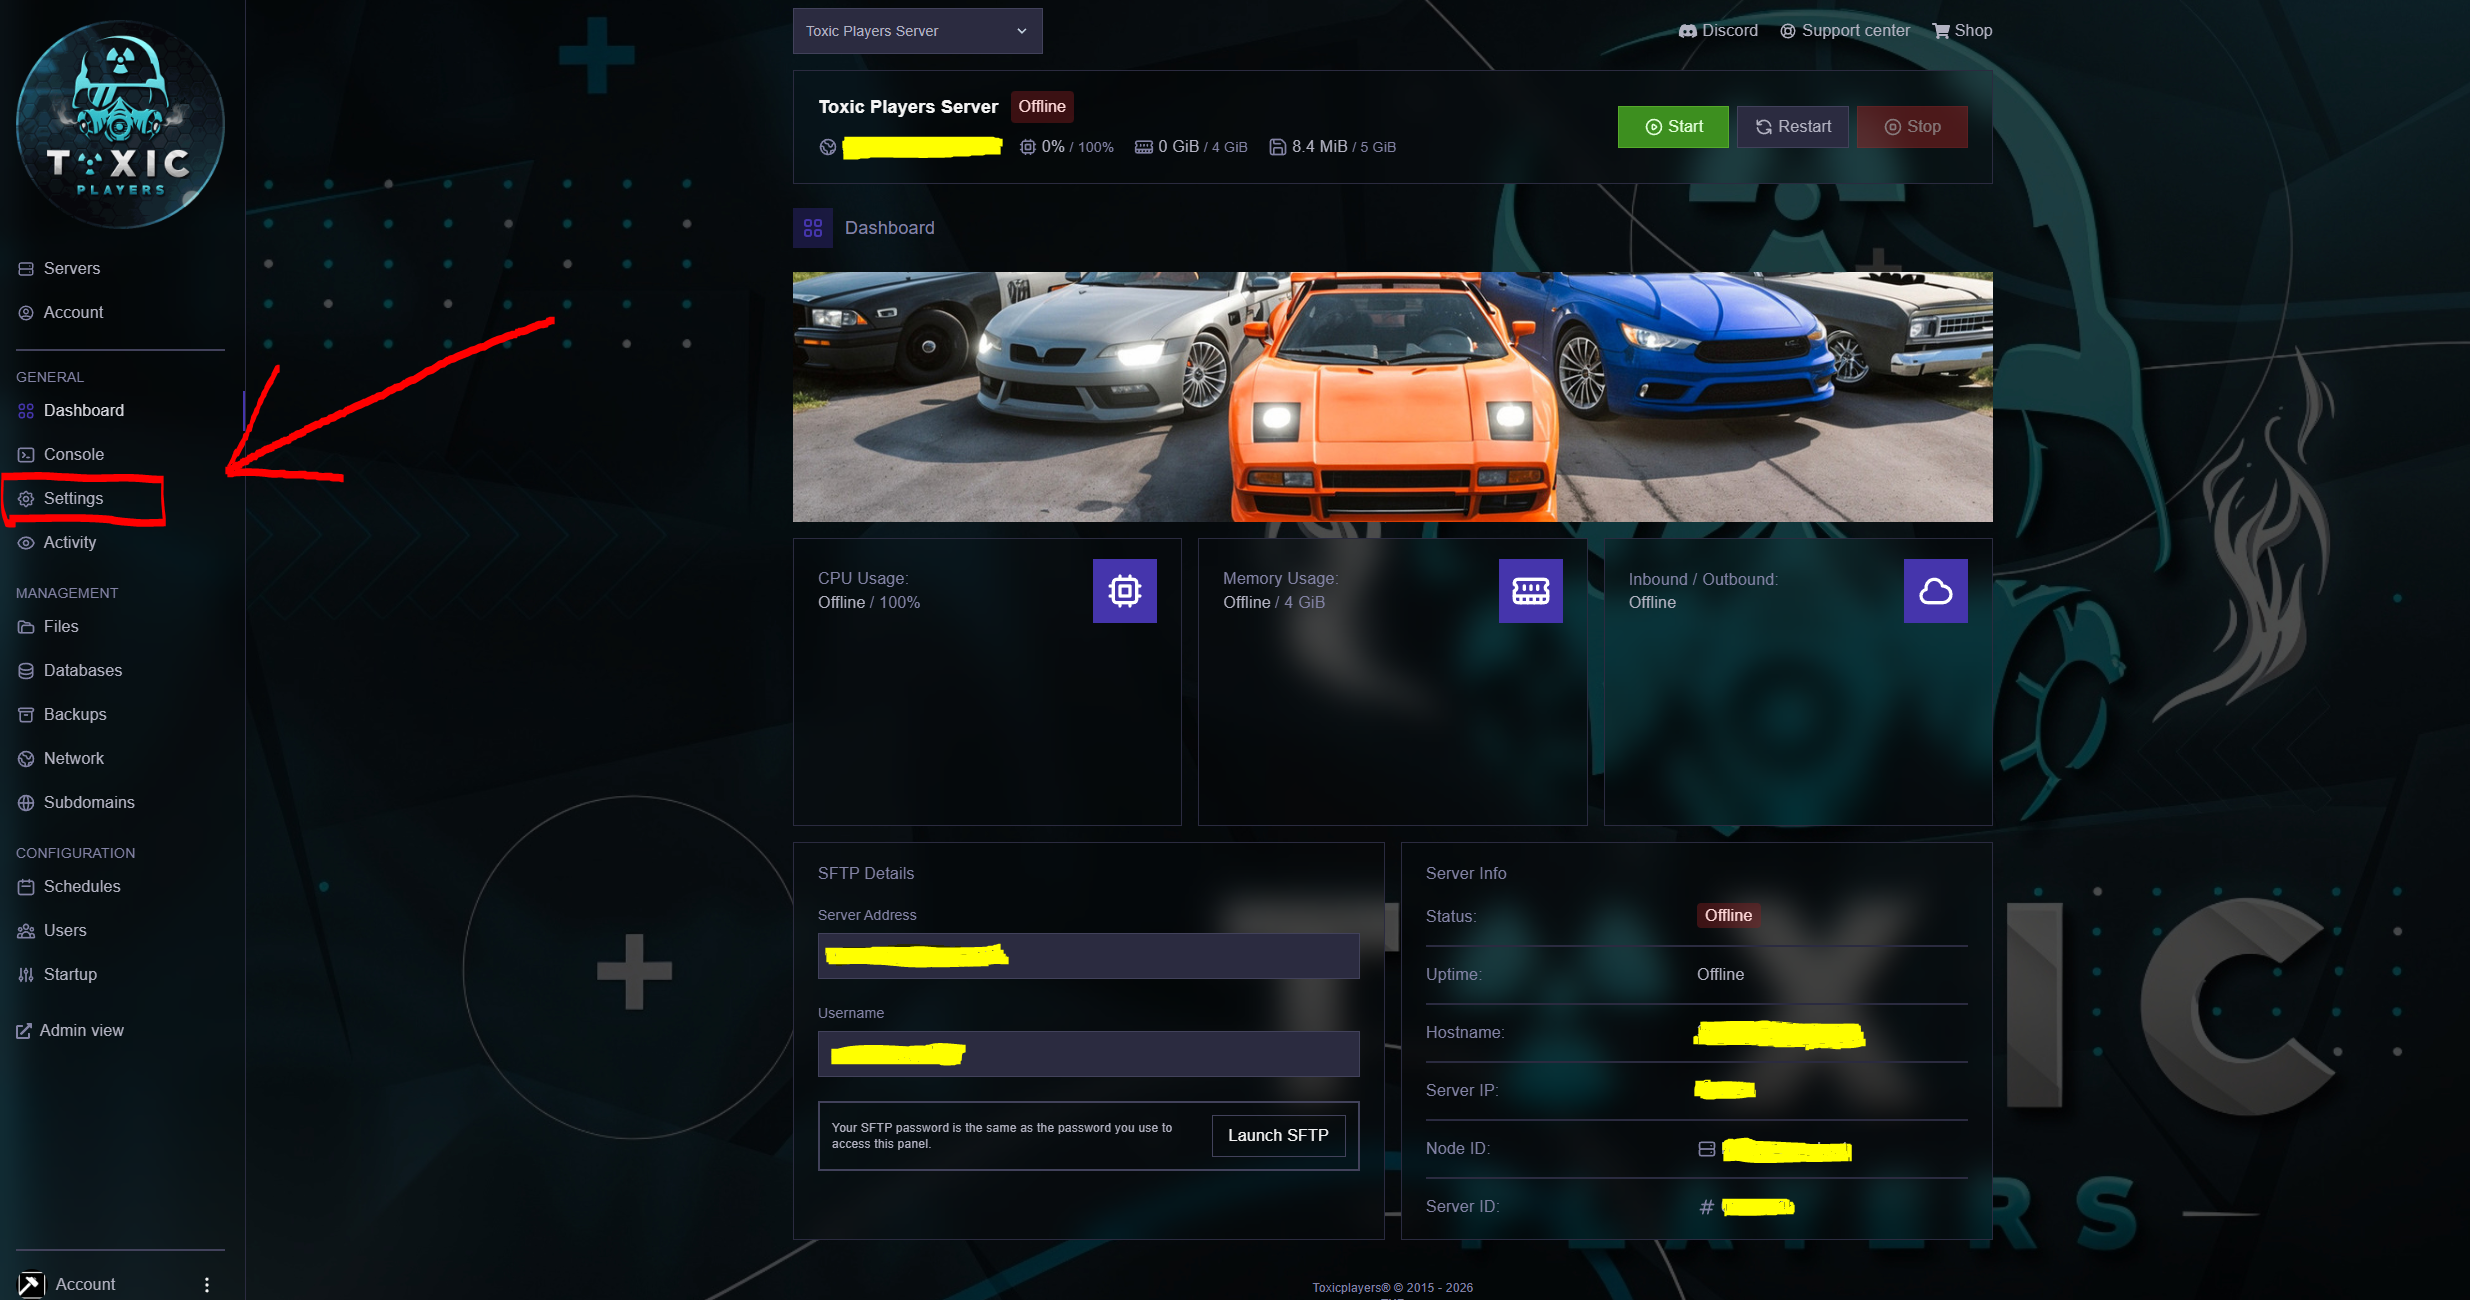
- Copy the Server Address and Username as shown in the image
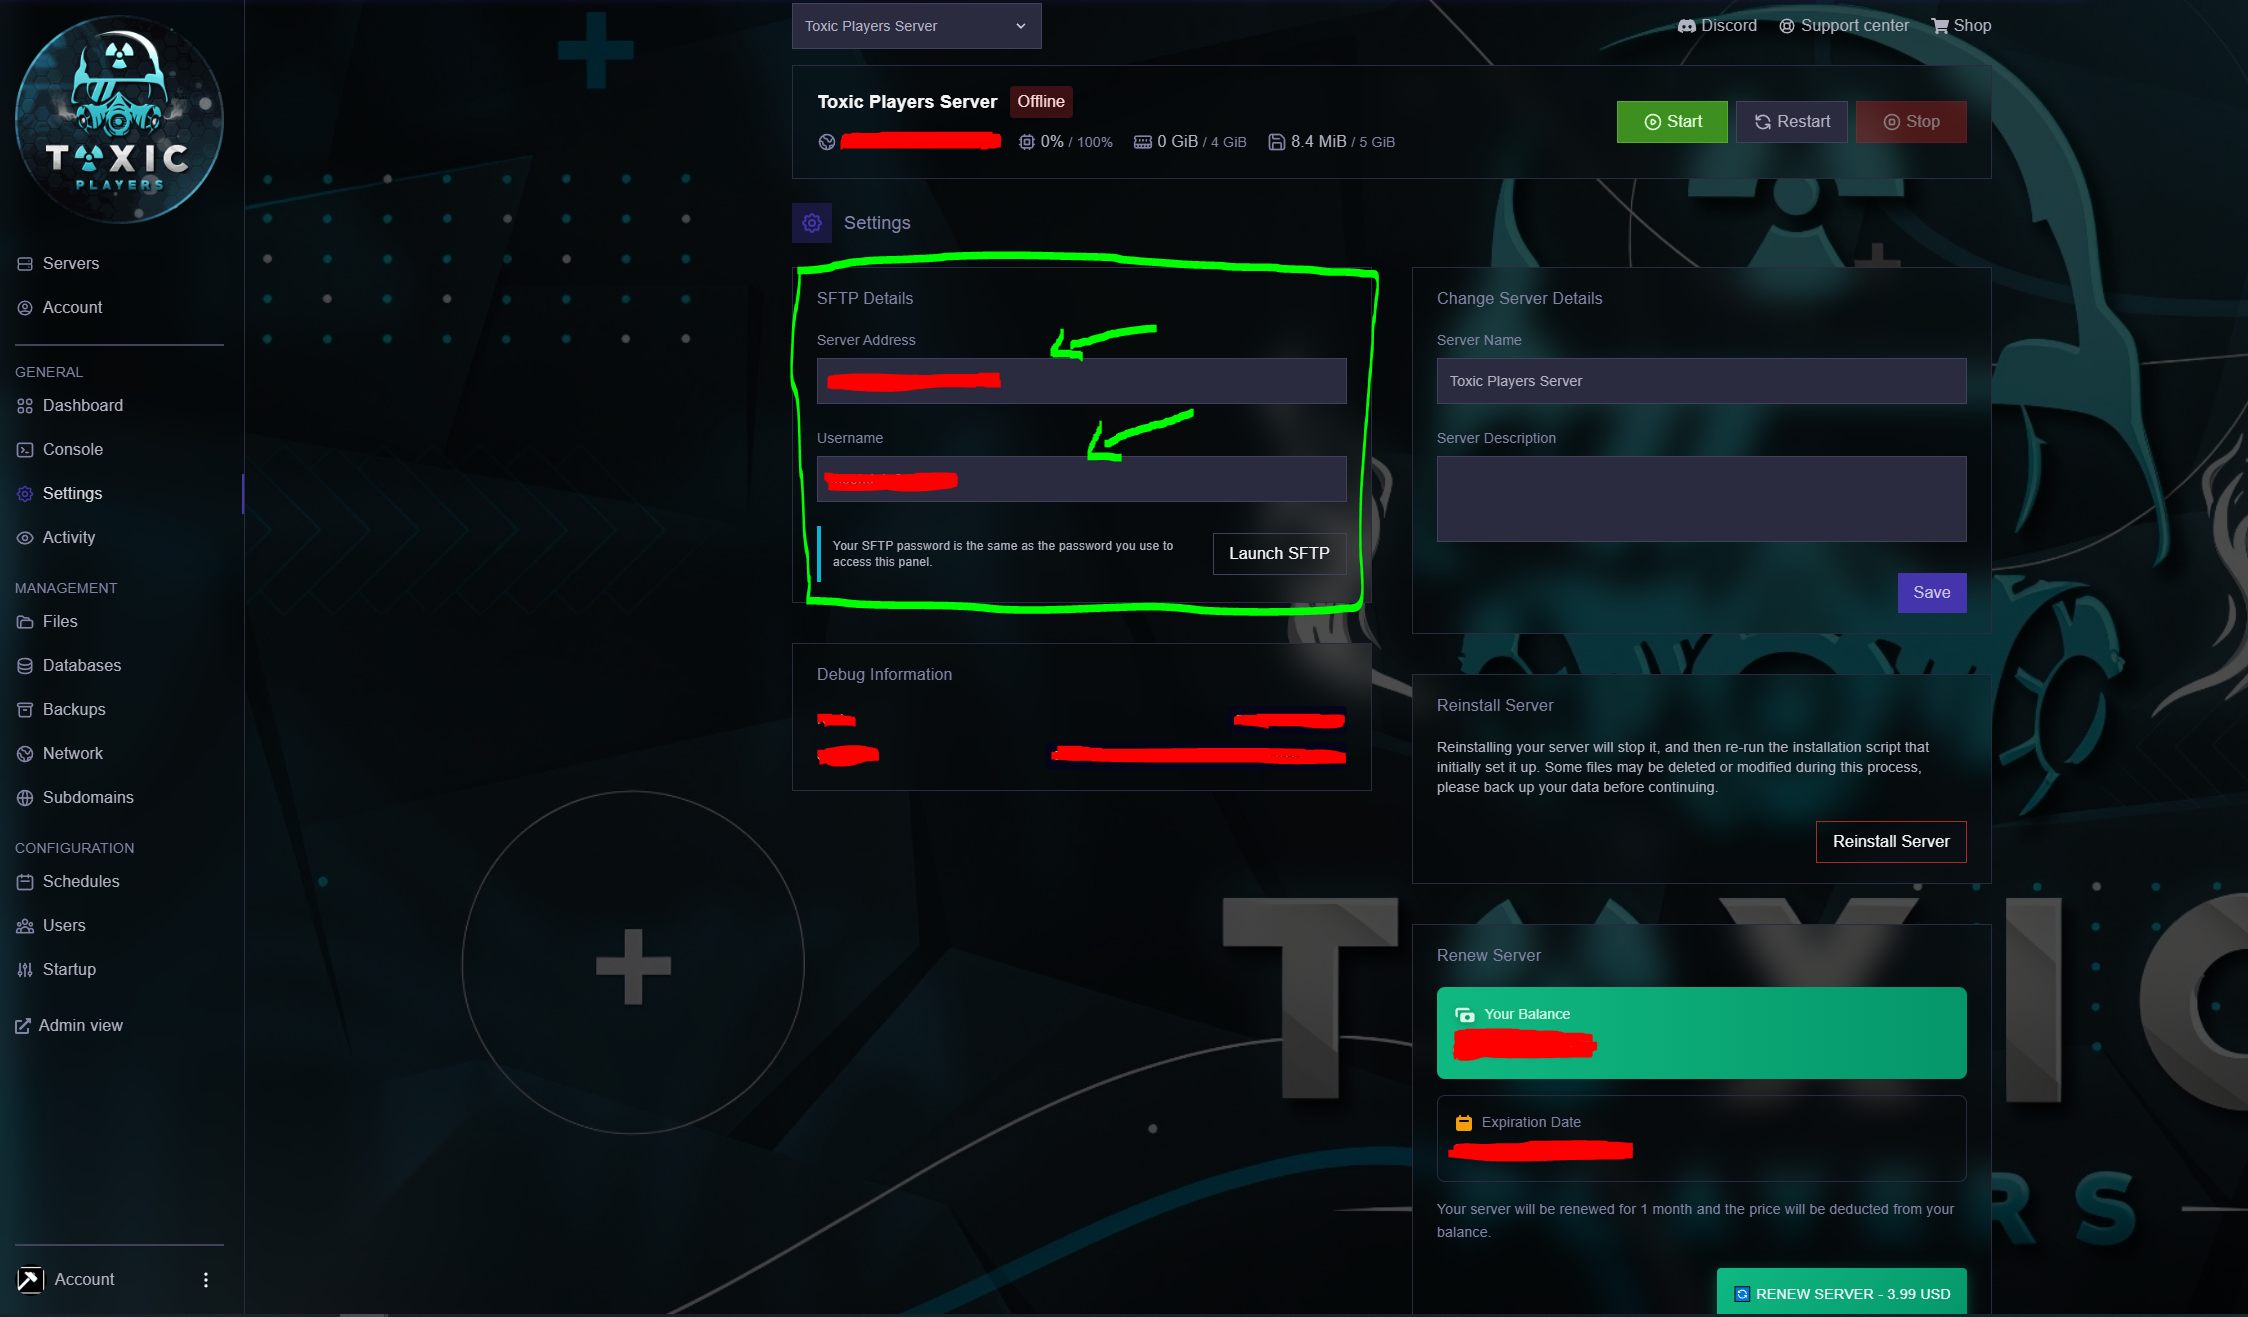
2. Install FileZilla (if not installed)
Download FileZilla from: https://download.filezilla-project.org/client/FileZilla_3.69.5_win64_sponsored2-setup.exe
3. Enter Credentials in FileZilla
Enter the following in FileZilla:
| Field | Value |
|---|---|
| Host | Server Address (copied from panel) |
| Username | Username (from panel settings) |
| Password | Your account password |
| Port | Leave empty |
- Username = The username shown in panel Settings
- Password = Your toxicplayers.co account password

Step 3: Map Configuration
1. Map File Location
Upload your map file (.zip) to the following directory on the server:
/Resources/Client
The map file must remain as a .zip archive — do not extract it. BeamMP loads maps directly from the zip file inside Resources/Client.
2. Set the Map Path in ServerConfig.toml
Open the ServerConfig.toml file located in the root of your server and locate the Map line under the [General] section.
Set the value to the internal path of the map, following this format:
Map = "/levels/<map_name>/info.json"
Example — if your map file is gridmap_v2.zip, the configuration would be:
Map = "/levels/gridmap_v2/info.json"
<map_name>is the folder name inside the map's.zipfile (usually matches the file name without the.zipextension).- The path always starts with
/levels/and ends with/info.json. - Restart the server after saving changes to
ServerConfig.tomlfor the new map to load.
Step 4: Uploading Mods
1. Mods Directory
All client-side mods (vehicles, maps, configs, skins, etc.) must be uploaded to the following directory on the server:
/Resources/Client
Any mod placed in this folder will be automatically sent to every player who joins the server, and loaded into their game session.
2. Connect via FileZilla
Use the SFTP connection you set up in Step 2 to open your server in FileZilla, then navigate to:
/Resources/Client
3. Upload Rules
When placing mods in /Resources/Client, follow these rules carefully:
| Rule | Details |
|---|---|
| File format | Must be a .zip archive (the original mod file). |
| Do NOT extract | Leave the file as .zip — BeamMP reads mods directly from the archive. |
| File name | Avoid spaces and special characters. Use underscores (_) if needed. |
| Location | Place the file directly inside /Resources/Client — not in subfolders. |
4. Example Structure
A correctly configured mods folder should look like this:
/Resources/
└── Client/
    ├── gridmap_v2.zip
    ├── custom_car_pack.zip
    ├── police_skins.zip
    └── traffic_mod.zip
5. Applying the Mods
- After uploading all mods, restart the server so BeamMP indexes the new files.
- When a player joins, the mods will be downloaded to their game automatically.
- To remove a mod, simply delete its
.zipfile from/Resources/Clientand restart the server.
- Client mods (sent to players):
/Resources/Client - Server mods (run only on the server — e.g. Lua scripts):
/Resources/Server
Do not mix them — a server-side Lua script placed in Client will not work, and a client mod placed in Server will not be sent to players.
Large mods increase the time players take to join. Try to keep the total size of /Resources/Client reasonable (a few hundred MB is usually fine — multiple GB will cause long joining times and disconnects for players with slow connections).